
SVGアニメーション – Web Animations API を使う – Element.animate()メソッドの options – fill
Element.animate()メソッド の options の fill について試してみます。
fill
forwards 再生後、キーを最後のフレームで保持
backwards 再生前、キーを最初のフレームに保持
both 両方を適用する
none どちらも適用しない
サンプルでは、アニメーションを2つ用意し、以下の状態変化をします。
アニメーション1 再生
↓
アニメーション1 再生終了
↓
アニメーション2 再生
↓
アニメーション3 再生終了
また、アニメーション1 は暖色系の色で変化します。
オレンジ
↓
イエロー
↓
レッド
アニメーション2 は寒色系の色で変化します。
ブルー
↓
パープル
↓
グリーン
今回の animate()メソッドの options の fill については、
アニメーション1 の options に指定し、割り当てる値 (forwards, backwards, both, none)により、
どのような動きになるのかを見ます。
<!DOCTYPE html>
<html>
<head>
<meta charset="UTF-8">
<title>テストHTML</title>
<style>
.params_box {
font-size : 0.8em;
}
.range {
width: 400px;
}
.code_view {
font-size : 0.8em;
padding : 5px;
margin : 20px 0;
color : #ffffff;
background-color: #000000;
}
.code_view_str {
color: #ff0000;
}
.status_view {
margin-bottom: 20px;
}
#start_animation {
margin: 0px 0px 30px 0px;
}
#status_message1, #status_message2, #fill_value {
color : #ff0000;
font-weight: bold;
}
</style>
</head>
<body>
<div class="status_view">
<div>ステータス1:<span id="status_message1"></span></div>
<div>ステータス2:<span id="status_message2"></span></div>
</div>
<div>
<input type="radio" name="fill_value" value="forwards" checked>forwards (再生後、キーを最後のフレームで保持)<br />
<input type="radio" name="fill_value" value="backwards">backwards (再生前、キーを最初のフレームに保持)<br />
<input type="radio" name="fill_value" value="both">both (両方を適用する)<br />
<input type="radio" name="fill_value" value="none">none (どちらも適用しない)<br />
</div>
<div>
<input type="button" id="start_animation" value="アニメーション開始">
</div>
<div>
<div class="params_box">
<span>duration (処理全体の秒数) : </span><span class="params" id="range1_value"></span>
<div><input type="range" class="range" id="range1" value="5000" max="10000"></div>
<span>endDelay (終了後の待機秒数) : </span><span class="params" id="range2_value"></span>
<div><input type="range" class="range" id="range2" value="5000" max="10000"></div>
</div>
</div>
<div class="code_view">
// アニメーション処理を実行 (animation1、animation2 共通で設定される)<br />
const options = {<br />
duration : <span id="code_view1" class="code_view_str">5000</span><br />
endDelay : <span id="code_view2" class="code_view_str">5000</span><br />
delay : <span id="code_view2" class="code_view_str">3000</span><br />
fill : <span id="code_view3" class="code_view_str"></span><br />
};<br /><br />
dom_rect.animate(keyframes, options);<br />
</div>
<svg xmlns="http://www.w3.org/2000/svg"
width = "500"
height = "100"
viewBox = "0 0 500 100"
>
<rect
id = "recttest"
x = "0"
y = "0"
width = "100"
height = "50"
/>
</svg>
<script>
// アニメーション対象のDOM要素を取得
let dom_rect = document.querySelector("#recttest");
// ステータス表記
let status_message1 = document.querySelector('#status_message1');
let status_message2 = document.querySelector('#status_message2');
let animation1;
let animation2;
// アニメーション1 keyframesの定義
const keyframes1 = [
{width:'100px', height:'50px', fill:'#FF6600'}, // オレンジ
{width:'50px' , height:'50px', fill:'#FFFF00'}, // イエロー
{width:'450px', height:'50px', fill:'#FF0000'} // レッド
];
// アニメーション2 keyframesの定義
const keyframes2 = [
{width:'100px', height:'50px', fill:'#0033FF'}, // ブルー
{width:'550px', height:'50px', fill:'#CC33FF'}, // パープル
{width:'300px', height:'50px', fill:'#339900'} // グリーン
];
// スライダの要素を取得し、イベントを付与する
let dom_range1 = document.querySelector('#range1');
let dom_range2 = document.querySelector('#range2');
// 各スライダーごとのイベントに、共通の関数を割り当てて処理する
dom_range1.addEventListener('input', change_range_slider);
dom_range2.addEventListener('input', change_range_slider);
// スライダーを動かした時の処理
function change_range_slider()
{
if (animation1) {
animation1.pause(); // アニメーション1を一時停止
}
if (animation2) {
animation2.pause(); // アニメーション2を一時停止
}
status_message1.innerHTML = '';
status_message2.innerHTML = '';
// 初期のアニメーション処理を実行
const fill_value = document.querySelector('input[name="fill_value"]:checked').value;
// アニメーションのオプションを取得
const currentOptions = {
duration : parseInt(dom_range1.value),
endDelay : parseInt(dom_range2.value),
delay : 3000,
fill : fill_value
};
// オプションを再設定する
animation1 = dom_rect.animate(keyframes1, currentOptions);
// アニメーション1の再生と停止
animation1.play();
status_message1.innerHTML = 'アニメーション1 再生';
// アニメーション1 再生終了時
animation1.finished.then(() => {
console.log("アニメーション1 再生終了");
status_message1.innerHTML = 'アニメーション1 再生終了';
// アニメーション2 生成
animation2 = dom_rect.animate(keyframes2, currentOptions);
// アニメーション2 再生
animation2.play();
status_message2.innerHTML = 'アニメーション2 再生';
// アニメーション2 再生終了時
animation2.finished.then(() => {
// アニメーション2 再生終了ログ
console.log("アニメーション2 再生終了");
status_message2.innerHTML = 'アニメーション2 再生終了';
});
});
// パラメータ値をHTML出力
let range1_value_dom = document.querySelector('#range1_value');
let range2_value_dom = document.querySelector('#range2_value');
range1_value_dom.innerHTML = dom_range1.value + "ミリ秒";
range2_value_dom.innerHTML = dom_range2.value + "ミリ秒";
let code_view1_dom = document.querySelector('#code_view1');
let code_view2_dom = document.querySelector('#code_view2');
let code_view3_dom = document.querySelector('#code_view3');
code_view1_dom.innerHTML = dom_range1.value;
code_view2_dom.innerHTML = dom_range2.value;
code_view3_dom.innerHTML = fill_value;
}
// ボタン要素のDOMを取得
let dom_start_animation = document.getElementById('start_animation');
// イベントを付与
dom_start_animation.addEventListener('click', StartAnimation, false);
// ボタン押下時の処理
function StartAnimation()
{
console.log("ボタン押下時の処理 ");
status_message1.innerHTML = '';
status_message2.innerHTML = '';
// 初期のアニメーション処理を実行
const fill_value = document.querySelector('input[name="fill_value"]:checked').value;
// パラメータ値をHTML出力
let range1_value_dom = document.querySelector('#range1_value');
let range2_value_dom = document.querySelector('#range2_value');
range1_value_dom.innerHTML = dom_range1.value + "ミリ秒";
range2_value_dom.innerHTML = dom_range2.value + "ミリ秒";
// アニメーションのオプションを取得
const currentOptions = {
duration : parseInt(dom_range1.value),
endDelay : parseInt(dom_range2.value),
delay : 3000,
fill : fill_value
};
// アニメーション1 生成
animation1 = dom_rect.animate(keyframes1, currentOptions);
// アニメーション1 再生
animation1.play();
status_message1.innerHTML = 'アニメーション1 再生';
// アニメーション1 再生終了時
animation1.finished.then(() => {
// アニメーション1 再生終了ログ
console.log("アニメーション1 再生終了");
status_message1.innerHTML = 'アニメーション1 再生終了';
// アニメーション2 生成
animation2 = dom_rect.animate(keyframes2, currentOptions);
// アニメーション2 再生
animation2.play();
status_message2.innerHTML = 'アニメーション2 再生';
// アニメーション2 再生終了時
animation2.finished.then(() => {
// アニメーション2 再生終了ログ
console.log("アニメーション2 再生終了");
status_message2.innerHTML = 'アニメーション2 再生終了';
});
});
let code_view1_dom = document.querySelector('#code_view1');
let code_view2_dom = document.querySelector('#code_view2');
let code_view3_dom = document.querySelector('#code_view3');
code_view1_dom.innerHTML = dom_range1.value;
code_view2_dom.innerHTML = dom_range2.value;
code_view3_dom.innerHTML = fill_value;
}
</script>
</body>
</html>
画面の「アニメーション開始」ボタンをすると、forwards、backwards、both、noneの選択により、
アニメーション1の開始前と終了後、アニメーション2の開始前と終了後の動作が変わることが確認できます。
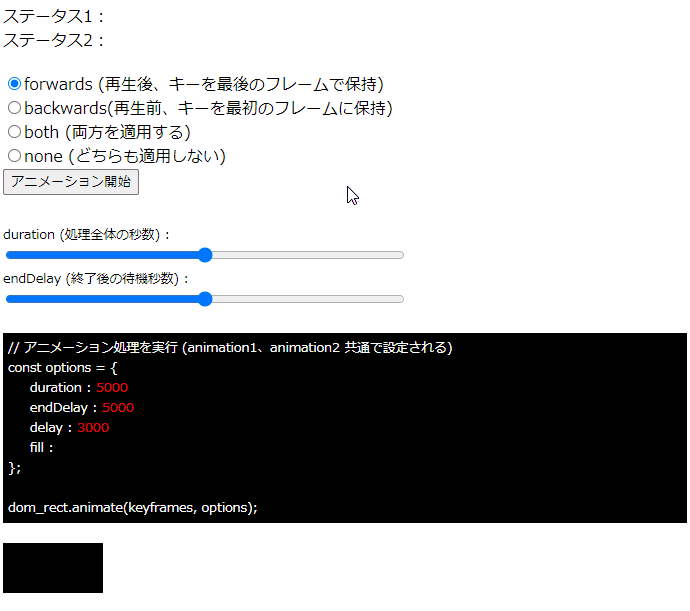
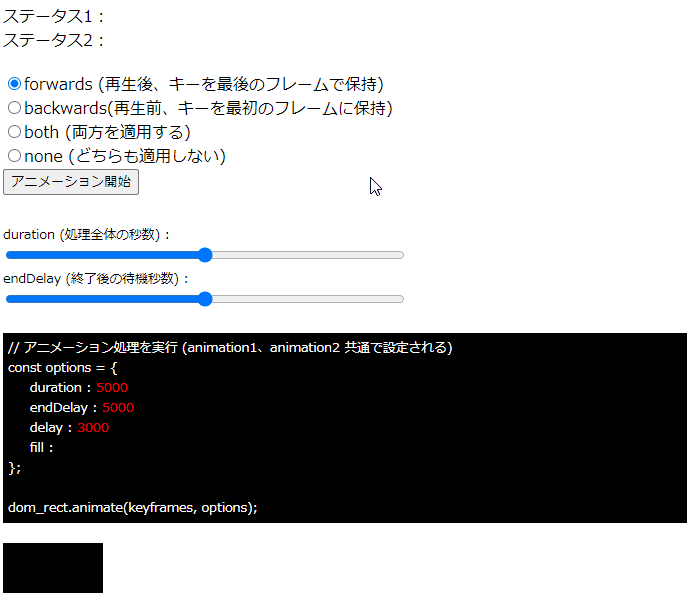
実行例
forwardsを指定した場合

backwardsを指定した場合

bothを指定した場合
noneを指定した場合
注意が必要な点としては、上記の実行例4パターンの全てで「delay」を3000ミリ秒を指定している点です。
fillの指定は、delayの値の前後に影響する仕様なので、delayが無指定の場合や、
0の場合はfillによる状態変化がわからなくなる点に注意が必要です。