XMLHttpRequestを使ったファイルアップロード(multipart/form-data)
XMLHttpRequestを使ったファイルアップロード(multipart/form-data)
前回の投稿ではXMLHttpRequestを使ったファイルアップロードを試しました。
その際、formの属性に「enctype=”multipart/form-data”」を記述しない形で試しました。
では、multipart/form-dataを記述する場合はどのような場合なのかを
今回は試してみようと思います。
multipart/form-dataを付与する必要がある場合というのは、
フォームの項目が、ファイルの選択と、それ以外のテキスト入力や、
チェックボックス、ラジオボタン、セレクトボックス、等の通常よく使われるフォーム項目がある場合、
それらとファイル送信を併用してサーバに通信する時です。
multipart/form-dataを記載することにより、サーバ側でファイル情報の他、
その他フォーム情報を受信して処理することができます。
前回の投稿を少し変更して、下記のようなHTMLを用意しました。
<!DOCTYPE html>
<html lang="ja">
<head>
<meta charset="UTF-8">
<title>テストHTML</title>
</head>
<body>
<form id="testform" enctype="multipart/form-data">
<div>
<input type="text" name="text1" id="text1">
</div>
<div>
<input type="text" name="text2" id="text2">
</div>
<div>
<input type="text" name="text3" id="text3">
</div>
<div>
<input type="file" name="file1" id="file1">
</div>
<div>
<input type="button" id="sample_file_upload" value="ファイルアップロードのテスト">
</div>
</form>
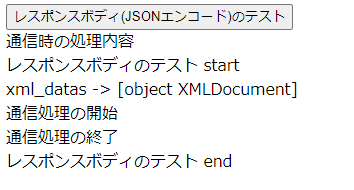
<div>通信時の処理内容</div>
<div id="ajax_result"></div>
<script type="text/javascript">
// ファイルアップロードボタンのDOMを取得
let element_sample_file_upload = document.getElementById('sample_file_upload');
element_sample_file_upload.addEventListener('click', SendXMLHttpRequest, false);
// ボタン押下時の処理
function SendXMLHttpRequest()
{
// 通信処理を画面に出力する為、操作用DOMの取得
let result = document.getElementById("ajax_result");
result.innerHTML += 'ファイルアップロードのテスト start' + '<br />';
result.innerHTML += '通信処理の開始' + '<br />';
// フォーム内容の取得
let testform_data = document.getElementById("testform");
// 送信用データ
let form_data = new FormData(testform_data);
// 通信用XMLHttpRequestを生成
let req = new XMLHttpRequest();
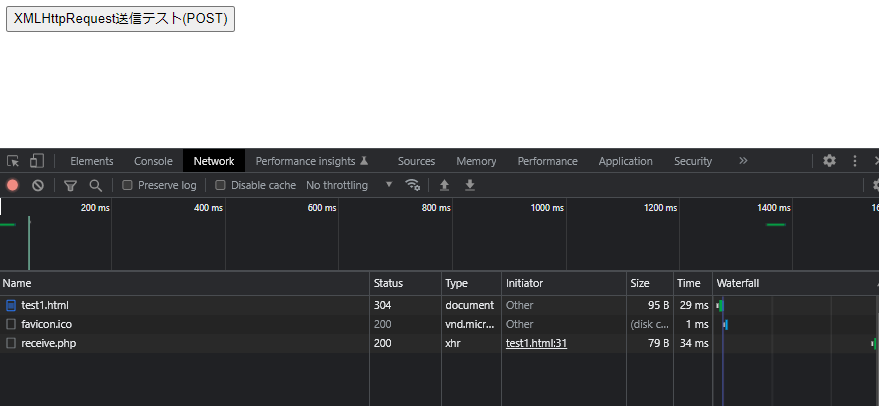
// POST形式でサーバ側の「response.php」へデータ通信を行う
req.open("POST", "response.php");
// ファイルが選択されたときに処理を実行するようイベントリスナーに登録
input_file = document.getElementById("file1");
input_file.addEventListener('change', function(e) {
form_data.append('file1', e.target.files[0]);
});
// ファイル送信
req.send(form_data);
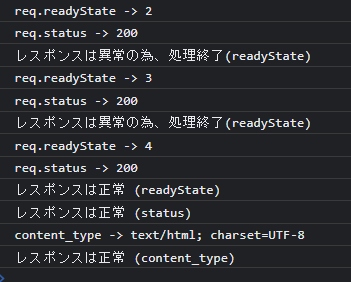
// 通信が完了したらレスポンスをコンソールに出力する
req.addEventListener('readystatechange', () => {
// ここでレスポンス結果を制御する
console.log("レスポンス結果");
});
result.innerHTML += '通信処理の終了' + '<br />';
result.innerHTML += 'レファイルアップロードのテスト end' + '<br />';
}
</script>
</body>
</html>
また、サーバ側のプログラムは、前回同様、下記のphpを用意しました。
<?php

// ファイルのアップロード処理
if (is_uploaded_file($_FILES["file1"]["tmp_name"])) {
	if (move_uploaded_file($_FILES["file1"]["tmp_name"], "./datas/" . $_FILES["file1"]["name"])) {
		chmod($_FILES["file1"]["name"], 0644);
		$ret = true;
		$message = $_FILES["file1"]["name"] . "をアップロードしました。";
	} else {
		$ret = false;
		$message = "ファイルをアップロードできません。";
	}
} else {
	$ret = false;
	$message = "ファイルが選択されていません。";
}

// 処理結果をjson形式用の形にまとめる
$json_value = array(
	"ret" => $ret,
	"message" => $message
);

// ヘッダーの指定と返却値をjsonで返す
header("Content-Type: application/json; charset=UTF-8");
header("X-Content-Type-Options: nosniff");
echo json_encode($json_value, JSON_HEX_TAG | JSON_HEX_APOS | JSON_HEX_QUOT | JSON_HEX_AMP);

?>
上記の記述はファイルの受信しか行っていませんが、
実際には、$_FILES の HTTPファイルアップロード変数の他、
$_REQUESTの HTTPリクエスト変数にも「text1」「text2」「text3」の変数の値が渡ってきていることがわかります。